


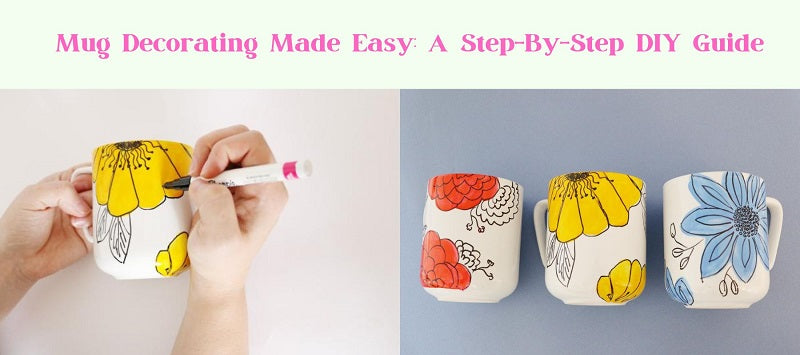

Ready to transform your ordinary mugs into extraordinary masterpieces? Our guide, 'Mug Decorating Made Easy: A Step-By-Step DIY Guide,' is here to help. It's packed with easy tips and tricks to start your decorating journey. Every coffee or tea enthusiast understands that the right mug enhances the experience. Now, you can personalize your mugs to reflect your style. Follow our guide to add a unique touch to your daily routine, making every sip more enjoyable.
Easy Steps to Decorate Mugs
There are 3 easy methods to customize and decorate your mugs: decorating with oil-based paint pens, using acrylic paint, and doing an image transfer with packing tape. Mastering these simple techniques, you can make your own personalized mugs in no time!
1. Decorating with Oil-Based Paint Pens
Use oil-based paint pens that can be baked onto ceramics
Choosing the right material is highly essential when learning how to decorate mugs. If you want to decorate mugs with paint pens, be sure to research.

To choose the right pen for your project, be sure to look for oil-based paint pens specifically designed for use in ceramics. This type of pen has been formulated to hold up when heated in an oven and remain dishwasher-safe after baking.
-
Make sure the pen is labeled as ‘ceramic’ or ‘heat-resistant’. These types of pens can withstand temperatures up to 400°F, and there is no need for any extra baking or sealing.
-
Most oil-based ceramic paint pens also come with different tip sizes, so you can get creative with your designs.
-
When choosing colors, choose bright options that stand out on the mug. Look for pens in various colors, from metallic gold and silver to bright, bold shades that will add a unique touch to your mug.
Wipe the surface of the mug with cotton balls and alcohol
Start your mug decorating by cleaning the surface with cotton balls and rubbing alcohol. This step ensures that your paint pen adheres well and removes any dirt or grease. Use a soft cloth and wipe gently to avoid scratching the mug's delicate surface. After cleaning, let the mug dry completely. Ensuring no alcohol traces remain is crucial before you begin painting. This preparation will keep your design clear and prevent any seeping.
Lay out your design
Designing your own mug starts with choosing the right style and size for your needs. Next, decide on the artwork, text, or patterns for the mug. You can include images, logos, words, or slogans. Consider special features like handle grips or extra colors for a unique touch. When arranging your design, aim for balance and visual appeal. Place each element thoughtfully, considering how they will interact. Be mindful of challenges in transferring the design onto the mug's curved surfaces or detailed areas, ensuring careful decoration for a perfect finish.
Paint your design on the mug
Once you decide on a design and have your materials ready, it's time to decorate your mug. Start with dry hands for better control. Use oil-based paint pens to outline your design on the mug carefully. Then, fill in each section with your chosen ceramic paints. If you slip up, quickly wipe away the paint with a Q-tip. Remember, once the paint dries, removing it becomes difficult. Let the paint dry completely to finish your masterpiece.

Paint your design on the mug
Let the paint dry entirely
When it comes to drying your mugs, patience is key! You must allow plenty of time for the oil-based paint to dry so that it won’t come off when handled or washed.
This drying period can take anywhere from 24 hours to several weeks, depending on how thickly you applied the paint and how humid the environment is.

Let the paint dry entirely
To speed up this process, consider using a hair dryer set on low heat or placing your mug in an oven set at 200 degrees Fahrenheit (93°C).
Bake the mug by following the directions that came with the paint pens
Insert the mug into a cold oven. Set the oven to preheat to the directed temperature, usually 350 F (177 °C).

Bake the mug by following the directions that came with the paint pens
Once the oven reaches temperature, let it bake for the specified time and then turn it off. Let the mug sit in the heated oven until completely cooled, which may take several hours.
-
If your paint pens didn't come with baking instructions, try baking your mug at 350 F (177 C) for 20 minutes. And once it's done, turn the heat up and let the mug cool down in the oven.
-
You should start the mug in a cold oven when it gets to temperature. Beginning the mug in a cold oven will allow the mug to reach temperature gradually, minimizing the risk of the mug shattering due to abrupt temperature changes.
2. Using Acrylic Paint
Buy paints that are made to paint on ceramic glaze
When starting to decorate your mugs with acrylic paints, you should check the label of the paint. If it says “for use on ceramics, " it will work for mug decoration.
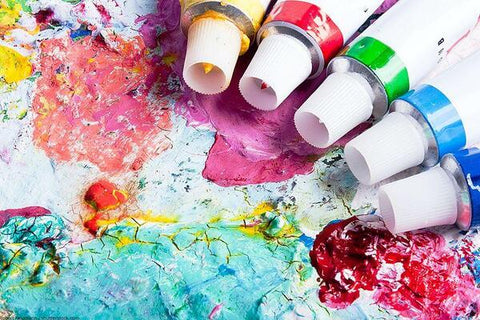
Next, look for specialty paints specifically marketed as suitable for painting on ceramic glazes. These paints have been designed to adhere to ceramic surfaces after baking in an oven at high temperatures.
- Select non-toxic paints if you use your mug for food and drinks!
Clean the surface of the cup
Before you start decorating, it is important to clean the surface properly so that the paint adheres nicely.
To clean the mug, first, rinse it off with mild soap and warm water. Once you have rinsed it off, use rubbing alcohol or a special cleaner formulated for ceramics to wipe down the cup completely.

Clean the surface of the cup
Let dry completely before starting your decoration process.
- If there is any remaining residue from stickers or labels on the surface of your coffee cup, gently scrape them away using a razor blade or sandpaper. This will ensure that no air bubbles form between the mug and the paint when you apply it later.
Keep your design away from where you will drink out of the mug
It’s important to keep the design from where you normally drink from the mug. This will help prevent smudging or chipping the paint when using the mug for drinking.

If you don’t have much experience painting mugs, try placing intricate patterns and details on areas that won’t come in contact with liquid or lip marks.
- If you put your design close to the rim of the mug, it can potentially dissolve into the liquid each time you take a sip, leaving an unpleasant taste in your mouth! To keep this from happening, make sure you leave at least an inch gap between where you plan on drinking and any decorations or designs on your cup.
Draw a preliminary layout on your mug (optional)
Drawing out the layout or sketch before painting can help you visualize the final design and give you an idea of how much space needs to be filled in.
- Make sure to sketch lightly! Pressing too hard on the surface could cause indentations in your mug, which would be visible after the painting is finished.

Draw a preliminary layout on your mug
Paint your design
Use this mug as though it were a work of art by adding decorative touches. Vary the patterns, shapes, colors, and textures you use, and have fun mixing and matching. Once your design is finalized, let the paint dry before using the mug.

Apply a clear coat on top of the design to make your decorations last
For hand-painted images you eat off countless times, a clear coat will make them last a lot longer. Setting your mug in the dishwasher may be ideal.
- Choose a clear coat that's applied to glazed ceramics.

Apply a clear coat on top of the design to make your decorations last
2. Doing an Image Transfer with Packing Tape
Print out a design with a laser printer
When decorating mugs with packing tape, choosing a laser printer for your designs is wise. Laser prints give clearer, longer-lasting results than inkjet prints. Remember two key points for printing your design. First, use thick sticker paper to prevent ink bleed-through. Opt for black or white paper, ensuring your design's direction is correct for mug application. Secondly, select sticker papers made for laser printing. They resist jamming and wrinkling during the heat transfer process, making your mug decoration smooth and hassle-free.
Cover the image with clear packing tape
Covering the image with clear packing tape is one of the crucial steps. When applying it, all parts of the photo or design are completely covered, so no portions will be missed during the transfer process.

Cut out the image
To begin, gather all the items you need: your chosen image or design, a pencil, scissors, a ruler or straight edge, adhesive paper (optional), and an X-Acto knife/scissor.

Cut out the image
Be sure to use a sharp blade and be aware of any surfaces that may be damaged by the blade. Use light pressure when cutting to make delicate cuts around curves without tearing them. Once your image has been successfully cut, it's time to prepare it for transfer onto your mug!
Soak the taped image in cold water for 5-10 minutes
Soaking your taped image in cold water does more than just help remove sticky residue. It also helps bond the ink from your transfer paper into the coating of your mug. This ensures that when washing the mug, no part of your design will fade or come off in any way!

Remove the paper from the back of the packing tape
To begin, cut off a small strip of packing tape approximately twice as long as your design. Gently peel away the backing paper until you are left with the sticky side exposed.

Remove the paper from the back of the packing tape
Place this sticky side onto a flat surface, such as a cutting mat or piece of cardboard, and then place your design over the top, so it sticks to the adhesive side. Use scissors to trim any excess tape if necessary.
Let the tape dry
Letting the tape dry is key to ensuring that your image transfer sticks properly. Give it at least 24 hours to set everything in place before you continue decorating your mug. Be sure to let the tape dry in a room temperature setting — heat or cold can cause problems with adhesion.
- Avoid touching or adjusting the tape until it has fully dried for the best results.

Let the tape dry
Apply the tape to the surface of the mug
This is essential in creating a beautiful, personalized mug you'll be proud of.
The first step is to apply the packing tape to the desired area of the mug. For best results, ensure all edges are completely sealed off so that no air bubbles form when you remove the paper backing from the tape.

Apply the tape to the surface of the mug
Consider adding several layers of tape for a thicker layer if you transfer an intricate design or if it will be used often. Additionally, take care not to stretch out or wrinkle the packing tape, as this can alter its adhesion quality when it comes to removal.
3. Mug decoration samples
Decorating with Oil-Based Paint Pens
The dandelion detail on this mug offers a glimpse of my personal creativity. You'll be to make one of these for yourself once you have mastered how to decorate your mugs!

Decorating with Oil-Based Paint Pens
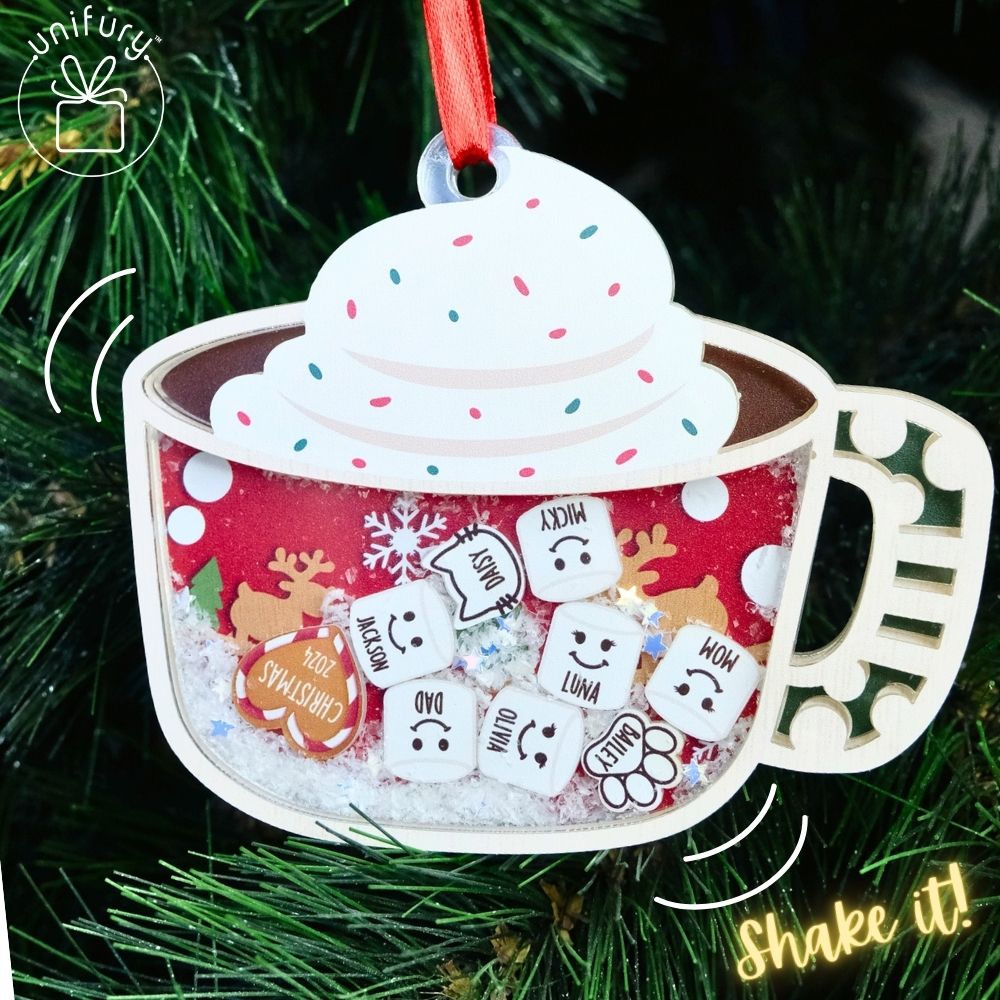
A fun, festive way to make an easy and affordable DIY holiday gift is to use a ceramic mug and marker to make a delightful hot cocoa mix.

Use a ceramic mug and marker to make a delightful hot cocoa mix
Not only does this design look minimalist, but its one-of-a-kind look can give any room an added flair of personality.
Using Acrylic Paint
This mug with a design of a tree with yellow leaves is the cutest thing you'll see today! It's the perfect way to add excitement and beauty to your coffee or tea routine.

Using Acrylic Paint
This mug is sure to stand out in any collection. Not only is it unique and chic, but it's also been painted with acrylic paint in various colors – making it truly one of a kind.

This mug with a design of a tree with yellow leaves
Doing an Image Transfer with Packing Tape
This mug has something special written all over it! Its simple design of the word “grateful” is made to inspire, reminding us to appreciate each moment and everything we have in life.

Doing an Image Transfer with Packing Tape
This mug is the perfect blend of style and fun. The intricate detail makes this special mug something you won’t find anywhere else. Plus, its vibrant colors will make you smile whenever you use it or look at it!

perfect blend of style and fun
FAQs on how to decorate mugs
What can I use to decorate mugs?
To make mugs unique, you can use paint pens, acrylic pens, and transfers.
Painting mugs is one of the most popular methods of how to decorate mugs. Acrylic paints or paint pens are easy to apply and let you create whatever design you choose on your mug.
Using transfers is another option when it comes to decorating mugs. Transfer paper allows you to print designs onto a special kind of paper which can then be applied to your mug with an iron or heat press machine.
Once I've transferred the image with packing tape, is my mug dishwasher-safe?
The answer depends on what type of packing tape you used. It is essential for you to know when learning how to decorate mugs with packing tape that some types of packing tape are not heat-safe. These tapes can melt in high temperatures, such as in a dishwasher.
Wrapping up
In general, if you want to ensure that your decorated coffee mug is dishwasher-safe, it's best to use heat-resistant packing tape specifically designed for ceramic items.
Thank you for reading this article. I hope this article provides you useful tips on how to decorate mugs. If you like our content, don’t forget to follow us for more!
You may also like:
👍 Sip in Style: Your Guide on How to Organize Coffee Mugs Tidily.
👍 Space-Saving Solutions: How to Hang Coffee Mugs Under Cabinets.
👍 How to Wrap Coffee Mugs for Gifts: Creative Presentations for Special Occasions.


Leave a comment